Welcome!
 Hey there! I'm Holly. A 40+ year old insurance-nerd wife, mom, beauty lover, and about a million other things in between.
This is the place where I share about our lives, what I'm currently loving, books I'm reading, plus-size style, beauty recommendations, health + fitness endeavors and anything else I'm finding interesting at the moment.
Thanks for stopping by!
Hey there! I'm Holly. A 40+ year old insurance-nerd wife, mom, beauty lover, and about a million other things in between.
This is the place where I share about our lives, what I'm currently loving, books I'm reading, plus-size style, beauty recommendations, health + fitness endeavors and anything else I'm finding interesting at the moment.
Thanks for stopping by!
Category Archives: Recipes
Slow Cooker Baby Back Ribs + Paleo BBQ Sauce

Fall officially begins on Saturday and for me that means it is time to bust out the crock pot. (You KNOW how much I love the crock pot, right?) I’ve been doing a little experimenting and revisiting some old stand-bys and I have to say I think this season should be full of yummy (convenient) eats! When it starts getting dark early I all of a sudden crave the Blue Plate Special served promptly at 5pm at my favorite bbq restaurant. The crock pot always helps make that happen.
But it’s also great on the weekends when you are dying for comfort food but don’t want to be standing over the stove — and you can file this recipe in that category. Recently around these parts there was a huge sale on Baby Backs at Whole Foods and I decided I needed some ribs!
Legit need.
You know the kind, right? Tender meat, falling off the bone, covered in saucy deliciousness? I wanted exactly that, except we were in the middle of our Whole 30 and rocking the super strictly Paleo! A good (completely) sugar free BBQ sauce is the El Chupacabra of the Paleo world. You always here that it exists, but up until recently I had never actually had success tasting one.
Luckily I found a recipe for BBQ Sauce in the back of It Starts With Food that was a sugar free riff on a Cooks Illustrated Quick BBQ Sauce and it’s official I HAVE SEEN (AND TASTED) EL CHUPACABRA. So I took to making a huge batch and slathering it all over some ribs!
May I suggest you do the same?
| Slow Cooker Baby Back Ribs + Paleo BBQ Sauce |
Prep time: 45 mins
Cook time: 6 hours
Total time: 6 hours 45 mins
Makes 2 cups of BBQ Sauce and 2-3 lbs of ribs.
Ingredients
-
- 2 Cups Tomato Sauce
-
- 2/3 Cups Unsweetened Apple Sauce
-
- 4 Tablespoons Apple Cider Vinegar
-
- 4 Tablespoons Coconut Aminos
-
- 2 Tablespoons Dijon Mustard
-
- 2 teaspoons Hot Pepper Sauce (I like Trader Joe’s Chili Pepper Sauce)
-
- 1/2 teaspoon black pepper
-
- 1 Tablespoon Ghee or GrassFed Butter
-
- 2 Cloves of Garlic, finely minced
-
- 2 teaspoons Chili Powder
-
- 1 teaspoon Paprika
-
- 1/2 teaspoon of cayenne (use more for extra SPICE!)
-
- 1 yellow onion, medium dice
-
- 2-3 lbs Pork Baby Back Ribs
- Salt, Pepper and Garlic Powder to taste
Instructions
-
- Mix tomato sauce, apple sauce vinegar, aminos, mustard, hot pepper sauce and black pepper until they are combined
-
- In a medium saucepan melt butter over medium heat and add garlic, chili powder, paprika and cayenne, stirring until fragrant
-
- Stir in your tomato sauce mixture and bring to a boil
-
- Simmer gently uncovered for 25-30 minutes
-
- Cool to room temperature in mason jar or other refrigerator safe container
-
- Meanwhile prep your crockpot by dicing one yellow onion and spreading it on the bottom of your slow cooker
-
- Liberally season your racks of ribs with salt, pepper and garlic powder
-
- Cut your racks to fit into slow cooker then stack a rack of ribs, coat with BBQ sauce and repeat until it’s full.
-
- Cook on low for 6-8 hours until the meat is falling off the bones
- Serve with a dipper of BBQ sauce on the side
There are lots of different ways to make ribs, and I love experimenting with all cooking methods. But something tells me that with football season coming up and Sundays spent lounging on the couch staying warm that this recipe will be the perfect fit.

Paleo Raspberry Almond Muffins

Make these, please. Would you? It’s a simple request really and will only cost you about 30 minutes of your time. I’m not a super huge muffin fan — I mean, I like them just fine, but I don’t dream about them. And I’m going to be honest with you and tell you that these muffins were mostly born from the need to use up some raspberries in the fridge and to find something for breakfast the following day. Last week the groceries around our here were slim pickins!
So I mixed them up, sprinkled some almonds on top, walked away and hoped for the best. The good news? Holy YUM — these were amazing! The bad news? They didn’t make it to breakfast the next day if you know what I’m saying. I think these may be my favorite paleo muffins yet. They have a fluffy egg base so they pack a protein punch, but the sweetness of the honey and raspberries really make you feel like you’re having a treat. Maybe that’s why we treated them like dessert, ahem.
I wouldn’t make them for breakfast every day, but for a treat — they are SCRUMPTIOUS!
Ok, find, we’ve made them 3 times since. (So much for treats, eh?)
| Paleo Raspberry Almond Muffins |
Prep time: 10 mins
Cook time: 20 mins
Total time: 30 mins
Serves: 12
Ingredients
- 6 eggs
- 1/3 cup honey
- 1 tbsp vanilla
- 1/3 cup melted and slightly cooled grassfed butter or ghee
- 1/2 cup coconut flour
- 1 tsp baking soda
- 1 banana, chopped finely
- 1 pint of raspberries
- handful of sliced almonds to garnish
Instructions
- Preheat oven to 350 degrees
- Mix eggs, honey and vanilla together until mostly combined
- Add in cooled but still melted butter
- Add coconut flour and baking soda to your wet mixture
- Add diced banana and whole raspberries to mixture
- Pour into silicone baking cups or greased muffin tin
- Sprinkle tops with sliced almonds
- Bake 20-25 min.
Do you have a muffin recipe that rocks your world? Extra credit if you leave me a link to that recipe. 🙂
Coconut Lime Shrimp Skewers

In our house shrimp is always a welcomed weeknight dish. By the time we get home from the gym it is usually after 6pm and our appetites are ravenous. If I haven’t prepared something on the weekend, I need our post-gym dinners to get on the table quick! This recipe goes from skewering to eating all in under a half an hour.
I love citrus based shrimp marinades (this one is a fave!) but shrimp is so delicate that you can’t let it sit in citrus too long or it begins to cook. While Melissa’s Ginger Lime Shrimp recipe is my go-to when I have an 40 minutes to prep/marinate, I wanted to find something that I could let sit overnight without risking the shrimp getting chewy and cooked by the citrus. This way I could prep it on a Sunday and have Post-Gym protein ready to go on the grill right when we got home on Monday — no waiting required. Then I found this recipe — similar flavors, but a slightly more forgiving marinade. Yay, coconut milk! Totally awesome in a weeknight pinch!
Check it out:
| Coconut Lime Shrimp Skewers |
Author:
Ingredients
- 1 Tablespoon minced ginger
- 1 Tablespoon minced garlic
- 1 Tablespoon grated lime zest
- 2 Tablespoons lime juice
- 1 (14 oz.) can Coconut Milke
- 2 lbs shrimp (21-26 ct) peeled and deveined
- 1/4 teaspoon kosher salt
Instructions
- In a medium bowl combine first five ingredients. Add shrimp, tossing to coat and chill, covered, at least one hour but up to 24.
- Meanwhile, soak skewers if using wood for up to an hour.
- When you are ready to cook, prepare a grill on high heat (450-550 degrees) and place 3-5 shrimp on skewers.
- Grill, turning once, until flesh has turned pink and is slightly charred. About 3 minutes each side.
- Serve garnished with salt, a squeeze of lime juice and extra lime wedges on the side.
- Enjoy!
;
The flavors almost had me convinced I was enjoying a tropical vacation on a Monday night. Aaaaaaaaaaaaaaaaaalmost. 🙂
Blackened Grilled Chicken

Blackened is a word where the more you type it, the more it doesn’t look like a real word. I assure you it is. And speaking of real, this blackened chicken is REAL-ly DELICIOUS.
In my arsenal of super simple recipes, this one ranks close to the top. I’ve made this chicken every week since we’ve been doing the Whole 30 because I can prep and grill it quickly on Sunday and it’s perfect to have laying around as Post-workout protein, a salad topping for a quick lunch, or to chop into chunks and mix up with some homemade mayo and celery for a spicy Cajun chicken salad.
Simplicity, for the win.
Blackening is a cooking technique that involves butter, spices and a hot cast iron skillet, and is traditionally used for fish. But if you mix up a blackening rub and use it on grilled chicken, you evoke all the fun and flavor of blackening, but without having to stand in front of a hot stove during the summer.
So let’s talk about essential steps. There are three. You ready?
| 3 Step Blackened Grilled Chicken |
Ingredients
- 1/4 Cup Salt
- 1 Quart Water
- 4-6 Large Chicken Breasts
- 2 tablespoons paprika
- 1 tablespoon ground dried oregano
- 1 tablespoon ground dried thyme
- 1 tablespoon cayenne pepper
- 1 teaspoon finely ground black pepper
- 1 teaspoon finely ground white pepper
- 1 teaspoon garlic powder
- Oil for your grill
Instructions
- Brine Your Chicken Breasts — This sounds very fancy but it is actually really easy. Ever since I learned how to do this, I won’t grill chicken breasts without brining. It makes THAT big of a difference. All you do is throw your chicken breasts in a gallon sized ziploc bag. Then in a pyrex mix 1/4 Cup of Salt into 1 Quart of water until it is mostly dissolved. Pour the mixture into your bag of chicken and let it sit for an hour or two. Note: I keep my ziploc bag inside another bowl just in case it decides to leak or something. Chicken juice leaking in the fridge is No Bueno.
- Liberally Sprinkle Your Rub Onto The Chicken. Then, um…Rub. Get a good coating on each side so it can get all up in your chicken. The brine gives you moisture and flavor from the inside, the rub is giving you a little FLAVA for the outside.
- Oil Up Your Grill and Grill Out! Make sure to oil the grates of your grill so there is no sticking (pour a little on a paper towel, turn the heat down for a quick second, rub your grates, presto!) Grill your chicken breasts until they are full cooked inside (depends on the size and thickness of your breast, but I usually find it to be somewhere between 5 minutes each side with the grill open, and a few minutes with grill closed.)
See? I told you it was easy!
Spicy Taco Brunch Skillet

Ole!
I woke up last Saturday morning wanting to have a fun brunch with Garrett and specifically thinking about Juli’s recipe for a Mexican Hash Egg Bake.
I wanted to make something that would look pretty (I love the way baked eggs look!) but also be seriously delicious since we were skipping the bacon with all of this Whole 30 business going on. I was too lazy to actually look up Juli’s recipe and follow it, but since I make up a huge batch of sweet potato hash just about every week, I used that as inspiration and got to work.
The result was completely satisfying nutritionally, but it also seemed decadent which made it feel a little special.
| Spicy Taco Brunch Skillet |
Ingredients
- 1 TBS Coconut Oil
- 1 Yellow Onion, diced
- 1 Bell Pepper (any color), diced
- 2 Medium Sweet Potatoes, diced
- 3/4 teaspoon salt
- 1/2 teaspoon pepper
- 1/2 teaspoon garlic powder
- 1/2 teaspoon onion powder
- 1/2 teaspoon oregano
- 1/8 teaspoon cayenne (more if you’re SPICY!)
- 1/2 lb. ground beef
- 1-2 Tablespoons of Taco Seasoning (to taste)
- 8 eggs
Instructions
- Preheat oven to 350 degrees
- In a large heavy bottomed oven proof skillet, melt coconut oil over medium/medium high heat.
- Add diced yellow onions and bell pepper. Saute for 5-10 minutes until softened.
- Add diced sweet potatoes and all seasonings through cayenne pepper and saute until those are softened as well, about another 15 minutes. Be careful to stir often so nothing burns, but the potatoes get some color.
- In the meantime, in a separate pan, crumble up and brown at least 1/2 lb ground beef (I usually cook up a big batch and use the leftovers for Taco Salad!
- Add 1-2 Tablespoons of Taco Seasoning per 1/2 lb, or to taste.
- When Sweet Potatoes are mostly cooked, add your taco meat into the oven-proof skilled.
- Crack 8 eggs over the top of the potato/onion/meat mixture
- Bake for 6-9 minutes, depending on desired egg done-ness. Keep in mind there will be some carryover cooking once you pull it out of the oven.
- Salt and Pepper your eggs to taste once the baking is finished, garnish with an avocado and enjoy!
Santa Maria Style Steak Rub
Oh friends, we need to talk about meat. You see, I enjoy it obviously — it is a staple in our diet — and finding creative ways to prepare it are basically always on my mind. What? Your brain isn’t a hamster wheel of meat prep ideas? Huh. Weird.
As a person with a full schedule, I am somemwhat partial to marinades because they always impart good flavor, can gussy up a tough cut of meat and they do all the seasoning work just sitting there in the fridge while you are out living life and GETTING THINGS DONE! As such, one of the chinks in my clean-eating armor is store bought marinade. Listen, we just can’t all be perfect all the time.
I love a good store bought marinade, alright. CONFESSED. I will take my lashings. But first, to add insult to injury, do you know what my favorite one is? Here is where you will really just let me have it: The pre-marinated Guy Fieri (OMG! I KNOW!) Santa Maria Style Tri-Tip they sell at Costco. I mean we all vote with our dollars when we buy are food, and I am voting (loudly) for irresponsible bleaching, hair gel, and sunglasses worn ON THE BACKS OF HEADS! My dollars shouldn’t even have the right to vote when I make decisions like that. But it is so convenient. So delicious. Oh, Guy I wish I knew how to quit you!
Oh hey wait, now I do.
You see when we started the Whole 30, I knew that this little habit would have to come to an end for at least 30 days (seed oils, preservatives, yada yada — Guy Fieri is not on the approved list. ha.) I was kind of hoping I could find a few good staple preparations that would leave my store bought marinade habit (along with my store bought dressing habit) in the dust, but it’s not like I hadn’t tried before. If you google Santa Maria style seasoning a million recipes pop up, and I promise I’ve tried many. But none really made my heart sing the way Guy Fieri did, until I read this post over on Simply Recipes.
But wait, that’s a recipe for how to cook Pork Shoulder on a gas grill, Holly. Are you crazy?
Nestled in that discussion of pork is a tiny little hint of a Santa Maria style seasoning. And one that I hadn’t tried! So I omitted the sugar and tested it out one night and HOLY HECK I broke up with Guy Fieri that very same night! My life? Instantly bleach-free! Well, until the next episode of Diners, Drive-Ins and Dives. I have a soft spot for that show. Ok, ok and a soft spot for Guy Fieri — stupid sunglasses and all. He’s a Nor-Cal celebrity. I can’t help it. Can we still be friends?
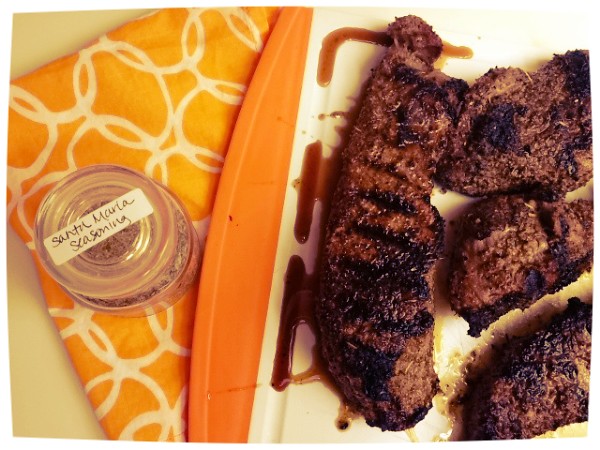
Anyway, speaking of Nor-Cal celebrities — Elise and Simply Recipes has changed my life. The rub was amazing, and is now a staple in our house, and full of so many easy ingredients that I insist you mix up your own batch! Heck, it would probably be great on chicken or grilled vegetables too. So darn delicious! And even better — clean as a whistle, and completely Whole 30 compliant.
| Santa Maria Style Steak Rub |
Author:
Makes enough to rub on 4-5 lbs of meat. Prep it in a container and it’ll keep for weeks!
Ingredients
- 2 Tbsp salt
- 1 Tbsp finely ground black pepper
- 1 Tbsp garlic powder
- 1 Tbsp onion powder
- 1 teaspoon cayenne (or more if you like more heat)
- 1 Tbsp dried oregano
- 1 teaspoon dried rosemary
- 1/2 teaspoon dried sage
Instructions
- Mix everything together
- Sprinkle liberally on steaks
- Massage into meat (ah! meat hands!)
- Let sit for 5-10 minutes
- Spray steaks with a little olive oil or grease your grill
- Grill those suckers!
- Enjoy life with out preservatives, weird stuff, or the judging looks of others considering how much money you spend supporting the Guy Fieri empire.
Check it out already, would ya?
Thirsty Thursday: Fresh Squeezed Honey Lemonade 3 Ways

Since I added it to my Summer Bucket List I’ve been itching to make some homemade lemonade. It’s such a delicious drink to enjoy outside at the end of a long day and it actually used be a staple sitting in my fridge. But here’s the thing – my old recipe? Began with 2 Cups of Sugar. Another secret is I use the best juicer in my opinion for making all juice recipes.
Don’t get me wrong, it was amazing! But I’m not really in the habit anymore of consuming 2 cups of white sugar at the end of a long day. That’s not to say I never indulge (obviously) but now when I do I feel like it’s got to be worth it. And to me, a simple beverage seems like more of a necessity and less like an indulgence, you know? So I wanted to find a way to still enjoy the ritual of a cup of lemonade on occasion, without having it be such a crazy nutritional gut bomb.
Amber left me a comment on my bucket list that initially inspired this recipe. (Yoga friends especially, check out her awesome website — she’s pretty amazing!) I then tinkered with it to make a larger batch, and of course made some variations (including one of the Adult Beverage variety.) The recipe does call for honey (local and raw if you’ve got it – might as well do yourself a favor), but it’s nowhere close to 2 cups of sugar anymore. It skews a bit on the tart side, which is my personal preference, so if you like it a bit sweeter feel free to adjust to taste!

| Fresh Squeezed Honey Lemonade |
Serves: 1 Small Pitcher
A lower sugar alternative to the traditional pitcher of summer refreshment.
Ingredients
-
- 16 oz Fresh Squeezed Lemon Juice (about 8 lemons)
-
- 1/2 Cup Honey (this is what I recommend, start here and adjust to your preference)
-
- 4 TBS Hot Water
- 32 oz Cold Water
Instructions
-
- Juice your lemons. I used Meyer Lemons which tend to be a little sweeter.
-
- In a small bowl mix your honey + hot water until the honey dissolves and you are left with a honey simple syrup. It’s ok to add more hot water if your honey is particularly thick.
-
- Mix lemon juice, simple syrup and cold water
- Serve plain or with one of the following variations
For Strawberry Lemonade
Blend 8-10 fresh or frozen strawberries with 2 TBS Water and 1 TBS honey to make a chunky puree. Add to the bottom of the glass, pour in honey lemonade.
For an adult beverage: Add a splash of Mandarin Orange Vodka for a twist!
For Iced Tea Lemonade
For a pitcher, brew a 16 oz of double strength iced tea (get as creative as you want with the flavor of your iced tea, or just use plain.) I used 4 black tea bags and steeped them in hot water for 4 minutes. Let the tea cool and mix with lemonade
For an adult beverage: Add a splash of vodka to spice up the night!
Then kick back, put your feet up and enjoy a little (lower sugar!) relaxation in a glass!
Bison Sweet Potato Chili

I realize I have been asking a lot of you lately. I mean first I try and make you love chicken thighs and now I am throwing bison at you? Man, I am just pushing all the scary meat on you lately, aren’t I?

Roll with me for a second though, because remember as part of my 2012 goals I am trying to eat more game.
Here’s the thing about bison though? Is is kind of awesome. It’s ground beef’s leaner and more iron-rich brother. Bison typically graze on grass and most of the time they aren’t fed commercial grains. It is super protein dense and contains tons of nutrients, but the caloric density is lower than beef and even pork. You know I hate counting calories, but I don’t pass up a good caloric bargain when I see it, so bison is a total WIN!
Let’s just say if ground beef is Donnie Wahlberg (who I love, of course, NKOTB forever!), then bison is Mark Wahlberg during the Calvin Klein underwear years.
Have I sold you yet? WHAT MORE CONVINCING COULD YOU POSSIBLY NEED?
If you are interested in having shirtless Mark Wahlberg over bison for dinner it but still a little bit scared, might I suggest trying it in chili? You can’t really go wrong trying a new meat in chili since there are so many other flavors going on, right? I especially like this chili because it is complex and full of vegetables. I originally saw a Bison Sweet Potato chili over on Paleo Girl and that really got my wheels turning. I decided to meld her recipe with my favorite-ever Damn Good Chili and thus, this recipe was born!
| Bison Sweet Potato Chili |
Serves: 4 Adults
Ingredients
- 1 TBS Coconut Oil
- 1 lb Ground Bison
- 1 Large Sweet Potato, peeled and cubed (small-ish bite sized!)
- 1 medium onion, diced
- 3 scallions, diced
- 2 small zucchini, diced
- 2 small yellow squash, diced
- 2 garlic cloves, minced
- 1 Jalapeno, seeded and diced (leave the seeds in if you like it HOT!)
- 1 4 oz can green chiles
- 2 TBS Cumin
- 1 TBS Chili Powder
- 1/2 tsp Paprika
- 1 Cup Tomato Sauce
- 1 14 oz can diced tomatoes
- 1 Cup of Beef Broth
- 1 Bell Pepper (color is your choice) diced
- Salt and Pepper to taste
Instructions
- Melt Coconut Oil in a large heavy bottomed pot (I used my 7 qt Dutch Oven)
- Add your onions, scallions, zucchini, squash and sweet potato and cook until vegetables have some color (about 10 minutes)
- Season layer with salt and pepper
- Add the bison, break up with your spoon and brown meat until it is no longer pink
- Add the garlic, jalapeno and green chiles and cook for another minute or two
- Season layer with salt and pepper and then dump in all your spices
- Add tomato sauce, diced tomatoes and beef broth and mix it all together
- Bring pot up to a boil and then lower to a simmer
- Simmer pot for 30 minutes, covered
- Uncover, add in diced Bell Pepper and simmer for another 10-15 minutes until desired consistency is reached. (I like a thick chili)
- Dish up and top with scallions, or any other desired toppings
- Enjoy!
See…that doesn’t look too scary, does it?

4 Easy Homemade Vinaigrettes
A quick glance at any of my menu plans and you know we eat a lot of salad around here. It’s a quick and convenient way to throw together protein and vegetables — and what can I say? I like to keep it simple. Apparently my commitment to simple thus far has precluded making my own salad dressing. Intellectually I KNOW it is easy, but it just seemed like such a fuss so I just continued to buy bottled salad dressings despite the fact that most have some pretty confusing ingredients.
Recently though, I have put my foot down. I make so many other things from scratch it was time to bust out the oils and vinegars, grab a mason jar and figure out how the heck to get it done. And you know what, IT IS SIMPLE! But more importantly, homemade salad dressing tastes so much better. Plus it looks cute in little mason jars in my fridge!
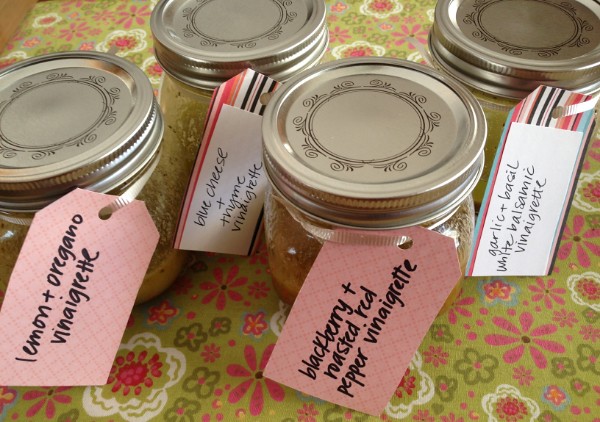
I came up with four dressings that have worked their way into our salad rotation and I thought you might like them too.

1/4 C Lemon Juice
1/2 C Extra Virgin Olive Oil
1 TBS Dijon Mustard
1/2-1 tsp Oregano
1/2 tsp honey (just a quick squeeze)
1/2 tsp salt
1/4 tsp pepper
Shake and pour!
This Dressing Is Great For: Greek Salads, Simple Grilled Chicken Salad, or a Chopped Salad with Tomatoes and Cucumbers
A Note About the Ingredients: I really like oregano so I tend to use the full teaspoon, but you could cut back to get just a hint. If you use meyer lemons you may not even need the honey, but I think just a hint of sweetness rounds out the flavor.

1/4 C Champagne Vinegar
1/2 C Extra Virgin Olive Oil
1/8 C Blue Cheese
1 TBS Dijon Mustard
1/4 tsp Thyme
1/4 tsp honey (just a quick squeeze)
1/2 tsp salt
1/4 tsp pepper
Shake and pour!
This Dressing Is Great For: Cobb Salads, Simple Mixed Greens, Steak Salads or Grilled Romaine
A Note About the Ingredients: You can really use any vinegar in here, I just really like how mild champagne vinegar is. Blue cheese is strong and so is dijon mustard. You don’t want too many competing flavors.

1/4 C White Balsamic Vinegar
1/2 C Garlic + Basil Infused Olive Oil
1 TBS Dijon Mustard
1/2 tsp honey (just a quick squeeze)
1/2 tsp salt
1/4 tsp pepper
This Dressing Is Great For: Caprese Salads, Mixed Greens topped with Tomatoes and Artichoke Hearts
A Note About the Ingredients: White Balsamic Vinegar is a game changer and it’s such a great compliment to an infused olive oil. If you can’t find a garlic and basil infused olive oil just add in a bit of fresh garlic and basil (or dried if that’s all you have on hand…it will be fine!)

1/4 C Blackberry Roasted Red Pepper Vinegar
1/2 C Extra Virgin Olive Oil
1/2 TBS Dijon Mustard
1/2 tsp honey (just a quick squeeze)
3/4 tsp salt
1/4 tsp pepper
1/8 tsp cayenne pepper
This Dressing Is Great For: Salads with spicy meat, Grilled Chicken Salad, Spinach Salad with Fruit
A Note About the Ingredients: This vinegar is to die for and it is by a company called Chapparal Gardens. If you want some fun flavors to mix with a delicious olive oil, check them out. Their Champagne Mimosa Vinegar…also delish! But this combo would be good with any fruity vinegar to taste. Feel free to experiment.
*****
So those are my newest kitchen creations…how do you make salad dressing? Are there any combos that you can’t be without?
Paleo Peach Pie Popsicles

Can we talk about vices for a minute? In the book I’m currently reading, one of the characters mentions to another that they seem to be smoking more often, and he’s concerned. He’s not particularly concerned about her smoking itself, but more because smoking is supposed to be her vice and thus should be enjoyed. By his logic, if you’re using your vice to relieve stress, it’s no longer a vice it’s a crutch. That didn’t make me want to run out and pick up a pack of cigarettes, but I do love the concept. A vice is an indulgence that should be enjoyed.
I can think of many vices I enjoy: a good gin cocktail, a tall glass of red wine, reeeeeeeeeeeeeally stinky cheese (sorry, I love it!) But my absolute favorite vice is ice cream. Leave me alone with a container of Haagen Daas or Ben & Jerry’s and don’t even think about talking me into sharing! This is mostly while I avoid it now, because ice cream (and sugar in general, for me) becomes a crutch. Most of the time this suits my lifestyle just find. While some people may enjoy a cold beer alongside a pack of Full Flavour Cigarettes, I’ve chosen to steer clear of that route.
Every once in a while though a sweet and creamy frozen treat is nice, especially now that it is getting hotter and our evening workouts are getting sweatier. Last week I was jonesing for something refreshing and decided I deserved some vice-like indulging. But when it came right down to it, I didn’t really want a pint of ice cream to hoard all to myself. I wanted something a little healthier, but still with that delicious vice-like quality, you know? 🙂
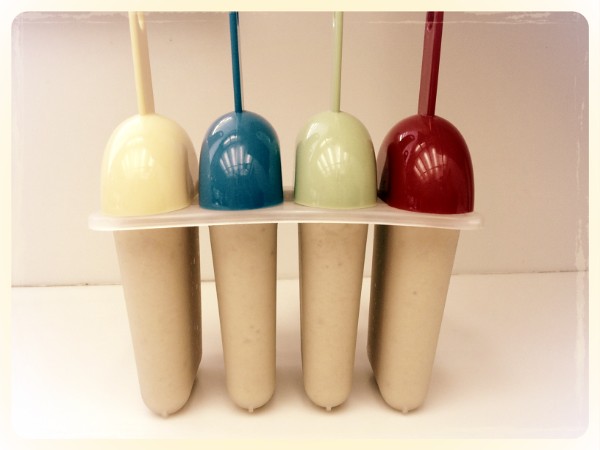
I took the popsicle inspiration that is running rampant on Pinterest, and make it work for my own lifestyle. Thus, the Paleo Peach Pie Popsicle was hatched.
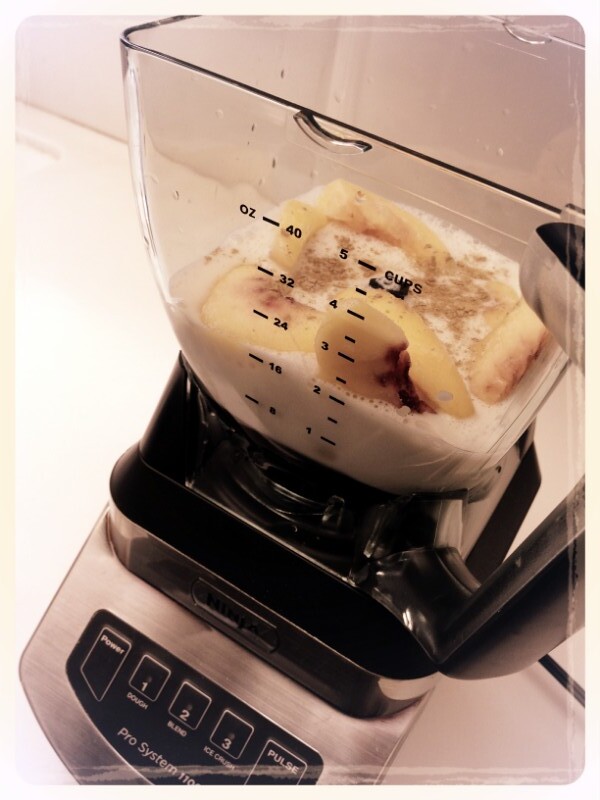
I mixed up a version of a Peach Pie Protein Shake, added a few little extras, and then poured it into 4 popsicle molds. Then I let it freeze for a few hours and voila! A slightly healthier frozen treat that we’ve been enjoying all week long (I made a tropical fruit batch that I’ll share next week!) It couldn’t be easier.
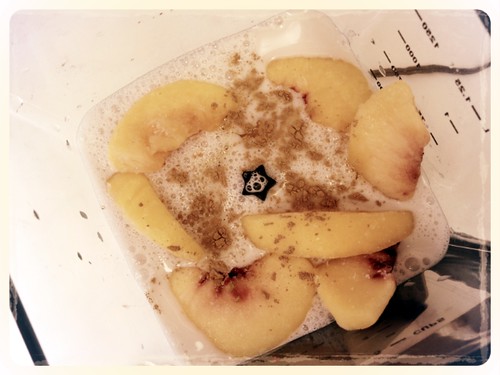
Paleo Peach Pie Popsicles
Adapted from I Eat Grass
Serves 4
Ingredients:
8 oz of Unsweetened Vanilla Almond Milk
5 oz of Frozen Organic Peaches
1 Frozen Banana (I keep them frozen on hand for green smoothies)
1 Scoop of Vanilla Protein Powder
1/2 tsp Vanilla Extract
1 TBS Agave Nectar or Honey
Cinnamon to Taste (I used probably 1/2 tsp. which I thought was awesome, Garrett liked it better with 1 tsp.)
Method
1. Add All Ingredients to the blender and let ‘er rip!
2. Pour into popsicle molds
3. Freeze 3-5 hours
4. Enjoy!