Welcome!
 Hey there! I'm Holly. A 40+ year old insurance-nerd wife, mom, beauty lover, and about a million other things in between.
This is the place where I share about our lives, what I'm currently loving, books I'm reading, plus-size style, beauty recommendations, health + fitness endeavors and anything else I'm finding interesting at the moment.
Thanks for stopping by!
Hey there! I'm Holly. A 40+ year old insurance-nerd wife, mom, beauty lover, and about a million other things in between.
This is the place where I share about our lives, what I'm currently loving, books I'm reading, plus-size style, beauty recommendations, health + fitness endeavors and anything else I'm finding interesting at the moment.
Thanks for stopping by!
Category Archives: Recipes
Thirsty Thursday: Spiked Strawberry Mint Cooler

I am no stranger to cocktail filled evenings spent outside on a patio wasting away the last few hours of summer light. Actually I have fond memories of evenings like that, but honestly these days with 3:45am wake up calls, workout filled weeks and action packed weekends, I can’t afford the morning-after consequences that come with those memories. But that doesn’t mean I want to be a complete tee-totaler and watch the season go by with nary an adult beverage, you know?
This beverage is my compromise.
Refreshingly devoid of sugary, syrupy mixers yet still packing the kind of punch that you hope for when reaching for a cocktail, this Spiked Strawberry Mint Cooler fits the bill to perfection. I have to warn you about two things though:
1. They go down easy
2. You actually need to starts brewing it up a few days before you drink it.
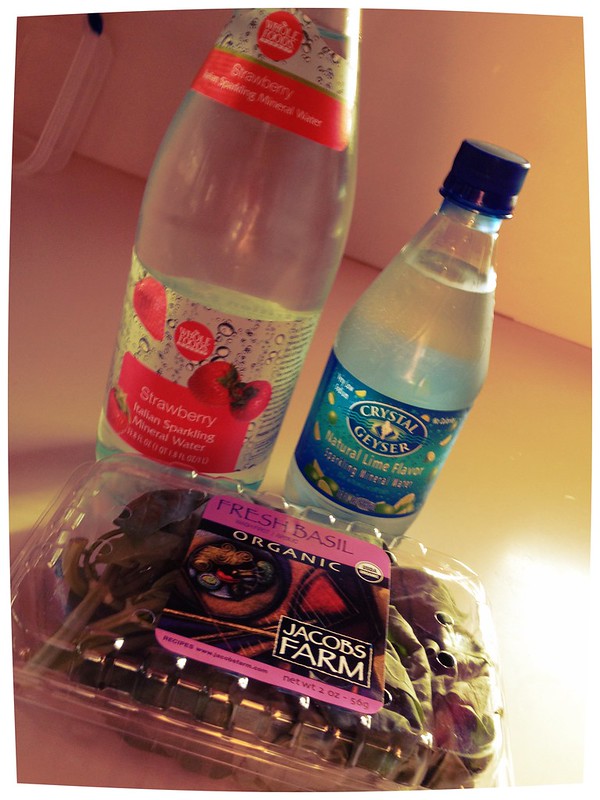
Enter: Strawberry Infused Vodka.
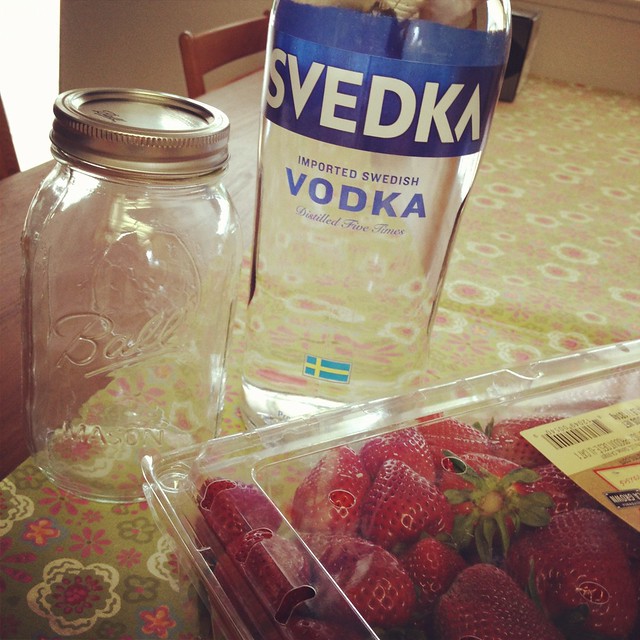
I followed this recipe to make the base of the cocktail, and just because it was super easy, I made some Pineapple Infused Vodka too (equally delicious!)
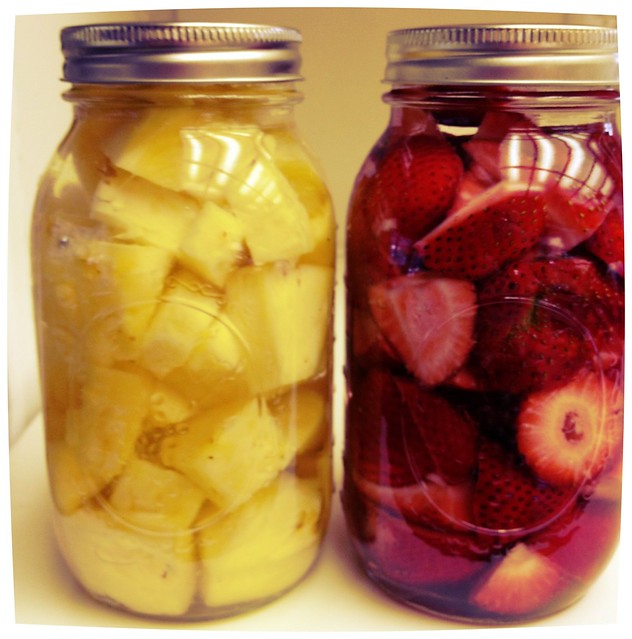
If you have 3 days, fruit, vodka and a dark closet — you can do this, I promise.
Once I had the strawberry vodka base, I wanted a mixer that was refreshing and low in caloric density. I can’t bust my butt all the time at CrossFit just to drink all my hard work away 500 calories at a time with a margarita, you know? (I prefer to eat my hard work away, remember?)
Enter: Mint Sparkling Water
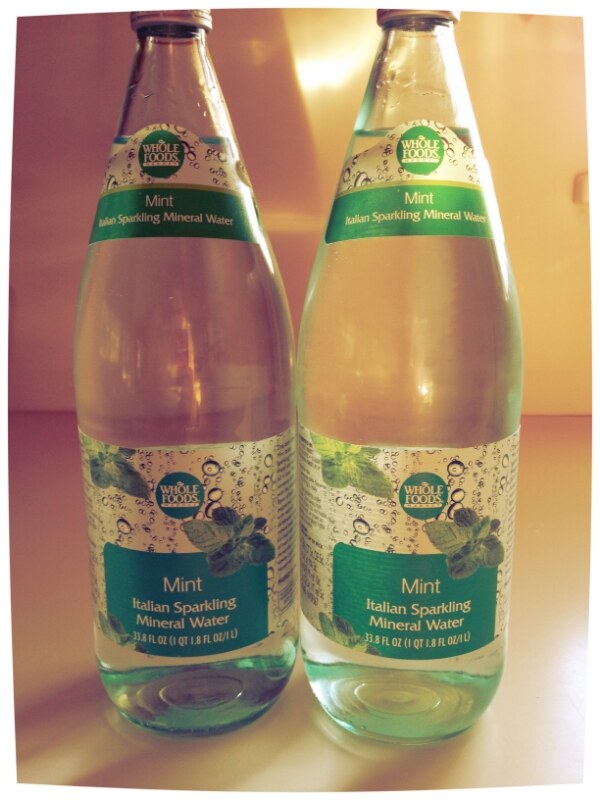
By itself, I think peppermint sparkling is a bit of an acquired taste. It’s delicious, but just a little different, you know? However as a cocktail mixer?
HOLY HELL, IT IS AMAZING.
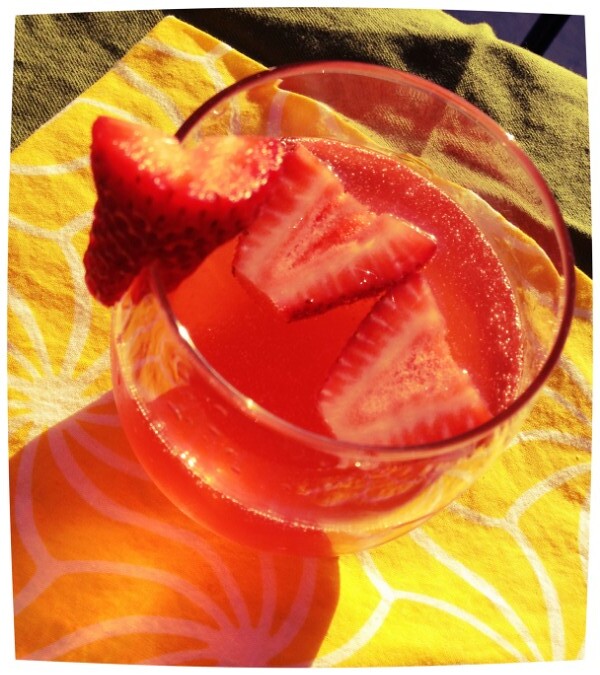
Add 3 Parts chilled Mint Sparkling Water to 2 Parts chilled Strawberry Infused Vodka, throw in a few frozen strawberries to make the whole ensemble, and drink up! I mean, using sparkling water as a mixer practically means you are hydrating while you drink!
Think Mint Sparkling Water sounds a bit crazy? Try Strawberry or Lime muddled with a little basil!
You won’t be disapointed.
*****
I’m certain that sparkling water coolers (with a bit of a kick!) are going to be making several appearances on my patio this season. How about you?

Grilled Marinated Flank Steak
As much as I like to talk about making things from scratch and DIYing and…wait, I rarely talk about DIYing, that was a bold face lie. So, let’s start over — as much as I like to think about DIYing and taking the time to make things from scratch and “enjoying the process” and all that — sometimes I just really love convenience. In the kitchen, this translates to a love of meals that come together quickly, yet are still full of flavor. So now that the weather is heating up I want to talk about a MAJOR FAVORITE in our household.
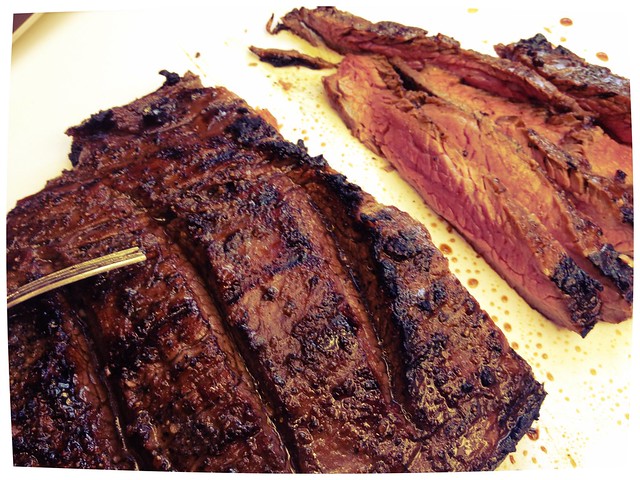
Grilled Marinated Flank Steak.
Can we talk about Flank steak for a minute? I mean, why wouldn’t we be talking about Flank steak — what else do you talk about around the water cooler on a Wednesday, right? Flank steak is one of those long and flat steaks that come from the abdominal area of a cow, and because ab muscles are *supposed* to be all rock hard and stuff, it can be a little tough. But if you treat it right, it will make your night — and yes, that is a poem I just wrote. Who wants to offer me a book deal on my poetry collection?
What that means to you, my friends, is that flank steak loves a good marinade. And I’m going to tell you about the best one I know of. It’s originally from Simply Recipes (who I love because on top of being brilliant, she’s from Carmichael — AWESOME!) but I make a substitution to keep it Paleo. Yo. (That was poem number two. You’re welcome.)
The thing I love about this marinade is that it involves simple ingredients, it’s quick to mix up and you can drop your flank steak in there in the morning, on your lunch break, or even the night before as it imparts awesome flavor. Heck I’ve popped my marinating steak in the fridge at 4:30 when I get off work and still had dinner on the table before 7. So it is super versatile! (Just don’t do more than 24 because the acidity of the marinade will start breaking the proteins in your meat down. No bueno.)
Enough talk though, let’s get to the goods, shall we?
Grilled Marinated Flank Steak
adapted from Simply Recipes
Ingredients
* 1/3 cup olive oil
* 2 cloves garlic, minced
* 2 Tbsp red wine vinegar
* 1/3 cup coconut aminos
* 1/4 cup honey
* 1/2 teaspoon freshly ground black pepper
* 2 pounds flank steak
* Kosher salt
* Garlic pepper (or just regular black pepper and garlic powder)
Method
1. Score the surface of the steak with 1/4 inch diagonal knife cuts about an inch apart across the grain of the meat. Mix up your marinade and pour it over your steak in a large freezer bag. Pop in the fridge and leave for at least 2 hours or up to overnight.
When it’s time to grill:
2. Grease your grill with olive oil (You can use a brush or just oil on a paper towel) and then preheat the grill on high for about 10 minutes. Flank steak likes high direct heat. This is awesome and practically fool-proof. Another reason I love this recipe.
3. Take the steak out of the marinade bag and generously season both sides with salt and garlic pepper. Garlic pepper is so darn awesome, you should try it. But if you don’t have it – salt, pepper and garlic powder will work just fine. Again be liberal with these seasonings. They make a nice tasty crust on the outside.
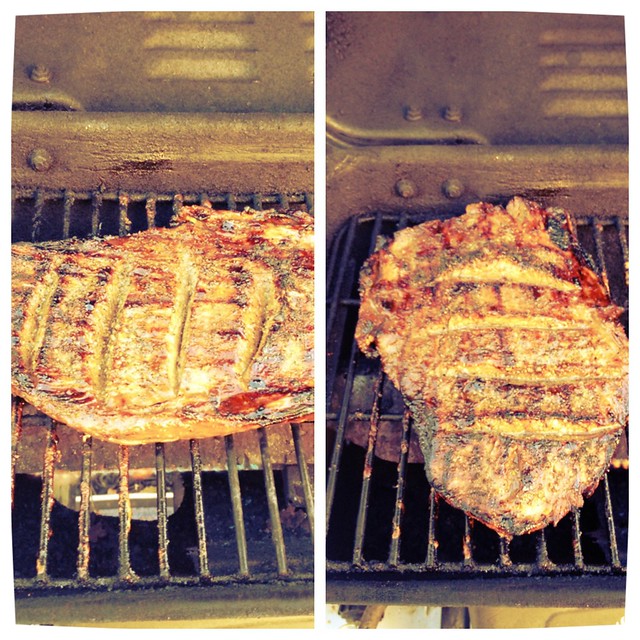
4. Drop your steak on the hot grill. I use a gas grill and I grill the entire time with the cover open. The breakdown goes a little something like this for a perfectly medium rare steak:
Grill for 2-3 minutes, then turn the steak 90°
Grill for 2-3 minutes, and flip over
Grill for 2-3 minutes, then turn the steak 90°
Grill for 2-3 minutes, and you’re done.
Yes, I use a timer. Yes I enjoy criss-crossed grill marks. You might too?
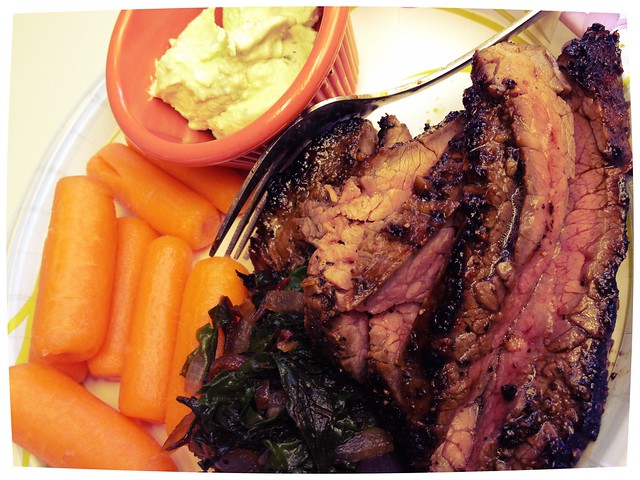
4. We are a medium rare household, and it’s a good thing too because flank steak gets a little tough if you over cook it. Adapt your cooking time from the suggestion above to your household’s liking. Then take it off the grill and place it on a cutting board (it’s efficient!), then cover it with foil and let it rest for at least 10 minutes.
5. Slice across the grain, and at a slight diagonal and enjoy!
6. And if you REALLY like convenience, enjoy on paper plates out in the back yard like we did! CONVENIENCE FOR THE WIN!
*****
How do you usually prepare flank steak? I love this recipe so much, we hardly ever deviate. But I am totally open to suggestions! Pass your recipes along.
Paleo Chocolate Chip Cookies

Listen, this definitely falls into the “treat” category, but it is a worthwhile treat in my opinion. Usually I am an abstainer from treats and would rather just have the real thing. You won’t find a lot of recipes around here for Paleo Desserts and such, because I’d rather just not eat dessert and then every once in a while have the kind of dessert I *truly* love (read: cake. always. every time.)
But sometimes you need to shake things up a bit. This weekend I had a hankering to bake (which RARELY happens in my house, I’m much more of a cooker than a baker) so I tried my hand at this recipe. Frisky Lemon is such a fun blog to read, by the way, stop by and check it out!
Now back to the cookies: They couldn’t have been easier, and I have to tell you the addition of cinnamon to the batter almost gave the cookies a flavor reminiscent of caramelized brown sugar. I think without it, these would just taste like cookies made from almond flour. The cinnamon is the ingredient that really makes magic! So hat tip to Allison for coming up with some real baking brilliance. If you and your friends are cookie lovers, you now can mail cookies to someone with Chocolate Shipped Cookies.
Ingredients
2 eggs, beaten
8 Tbsp butter, melted in the microwave
1 Tbsp vanilla
1/3 cup raw honey
1 1/2 cup almond flour
1/4 cup coconut flour
1/4 tsp sea salt
1/4 tsp baking soda
1 tsp cinnamon
2/3 cup dark chocolate chips
Method
1. Preheat oven to 350 degrees, line a baking sheet with parchment (always a must with Paleo baking!)
2. Mix melted butter, eggs, honey and vanilla in a medium sized bowl.
3. Sift together all of the dry ingredients (except chocolate chips) directly onto the wet ingredients, stirring occasionally to mix the batter.
4. Fold in chocolate chips.
5. Your dough will be sticky/gooey — that’s ok. Spoon 2-3 TBS of batter on the parchment for each cookie.
6. Bake for 15-20 minutes. Mine came out perfect at 16 minutes.
7. Enjoy with an icy cold beverage of choice!
Taco Salad: A Love Story

You all, it’s time.
It’s time for me to admit that I have an addiction that you probably caught on to ages ago if you have ever read one of my meal plans.
I am completely addicted to Taco Salad
I literally MUST eat it every week and I know that is just the most boring thing. I want to feel bad about it. I want to change my ways and be that person who whips up magical salads that are diverse all of the time. But this salad just sings its siren song too often, so nary a week goes by when I don’t eat it.
It’s simple and no frills, but I think it’s high time I told you about it in case you need a new addiction. It’s a piece of cake.
Ingredients:
1 Head of romaine
1 Cup Cherry Tomatoes sliced in half
1 Cup Cucumbers
Red or Yellow Bell Peppers to taste (I’ll just slice up an entire pepper because I’m CRAZY…woo hoo)
Half an Avocado, salted and diced
Thinly sliced red onion, if you don’t have a meeting right after lunch
3 sliced radishes
A handful of black olives
4-6 oz browned ground beef, mixed with this taco seasoning
Method:
Uh…mix it altogether and toss with dressing. That’s all folks.
Ah yes, let’s talk about dressing
You need this in your life! It’s really that simple. And that, my friends, is my latest addiction.
*****
Do you have a favorite lunch that you MUST HAVE every week. Do share!
Cauliflower Pizza with Bacon, Brussels Sprouts + Shallots
On Friday night I had a somewhat empty refrigerator and only a miniscule amount of creative energy. Fortunately when I added the two together I came up with this:

It was the best faux-pizza I’ve ever made, actually. Hands down. It was a cauliflower crust topped with bacon bits, sauteed sliced brussels sprouts and a sprinkle of crispy shallots. When I took the first bite, I realized that this was one of those recipes that needed to IMMEDIATELY make it’s way to the blog.
But I feel the need to make a slight disclaimer: my love for Paleo aside, I am firmly in the camp that pizza has no substitute. Pizza is doughy and bready and indulgent — well, at least the good kind is — and when I hear about things like Cauliflower Pizza Crust — I don’t care how good it is NOT REAL PIZZA CRUST. You will not sell me on the fact that this is as good a Real Pizza.
So I am not making that claim. I will not try to foolishly dissuade you from loving Real Pizza. There is no substitute.
But the thing is, we all need to eat our vegetables, and cauliflower *IS* a pretty yummy and versatile. So when you make that vegetable into something crusty and add some delicious toppings, it actually turns into a pretty amazing (guilt free!) dinner. And a pizza-like dinner, no less.
So even though I do not claim this is will all of a sudden replace your desire for deep dish, I will claim that this will be one of the best Friday night meals you’ve ever had when all you have in your fridge is a few vegetables and a couple slices of bacon.
Ingredients
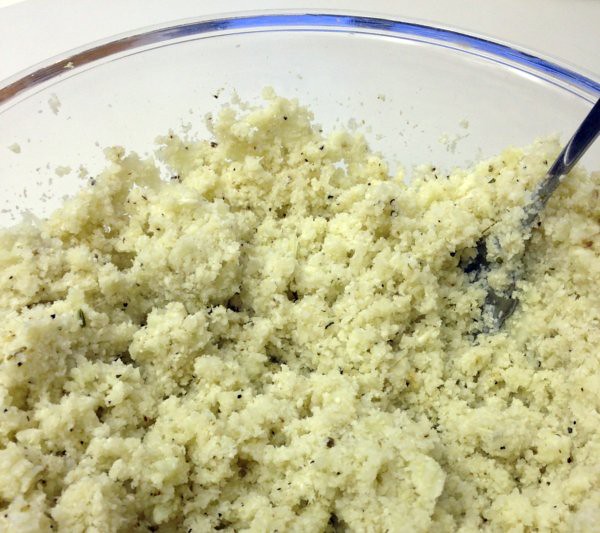
1 Head of Cauliflower, chopped incredibly fine in the food processor
1 egg, beaten
1 cup of shredded cheese for the crust, more if you want to top your pizza with it as well
1/2 tsp each garlic powder, onion powder, black pepper
1 tsp salt and pizza (or italian seasoning)
Toppings of Choice — in this case: brussels sprouts, bacon and shallots
Method
Preaheat your oven to 400 degrees
1. Chop your cauliflower in the food processor until it is finely minced. It sounds like a pain but trust me it will be worth it. When it’s shredded into a fine powder, pop it in the microwave in a bowl for 6 minutes. Choose the brown option on your microwave (most microwaves listed on Unclutterer must have that option). No need to add water or anything. Let it cool for about the same amount of time.
2. Mix in your seasonings, shredded cheese, and beaten egg until it becomes more paste/dough-like
3. Spread on a cookie sheet covered in parchment paper (a must!) until it is fairly thin and looks like a big ol’ pizza crust.
4. Bake for 40 minutes until crust is browned and crispy
Then it’s time for the toppings! Here’s what I did:
5. While crust is baking, fry up some bacon bits in a pan. You know how to do this, it’s easy — I only had 5 slices of bacon and I was fine. But if I would have had more, I would have added more. More Bacon=Better. I think it’s science. Pull those puppies out and lay them on a paper towel somewhere.
6. Then slice up about 8 clean brussels sprouts into ribbons and throw them into the hot bacon renderings. This is always delicious.

7. When they get nice and sauteed and have a little color on them, pull those out of the bacon renderings too. You can even throw them on your bacon bits sitting there. It’s ok to mix everything together — GET WILD.
8. Thinly slice a whole shallot and throw THAT into the bacon renderings. These renderings are really doing triple duty. Let them get so crispy they almost appear burned.
Wine Break!!!
(Your crust will still be cooking even though your toppings will be done.)
9. Pull out your crust when it’s browned, top with cheese (no sauce!) top with bacon, brussels and crispy shallots and then throw it into the oven for about 5 minutes just until everything is melty and delicious looking.
10. Let it cool about 5 minutes, slice, serve and enjoy.
11. Serve with a salad and then smugly realize you are eating A LOT of vegetables, even though it feels like you are having Pizza Night!
*****
Do you have any favorite variations on Cauliflower Pizza Crust?
Spinach Salad: The John Malkovich of Salads

Here’s the thing about spinach salad: it’s seems slightly more exotic than your average salad, right? But in the end it’s just a salad, like every other salad: some green stuff, some other stuff, some dressing.
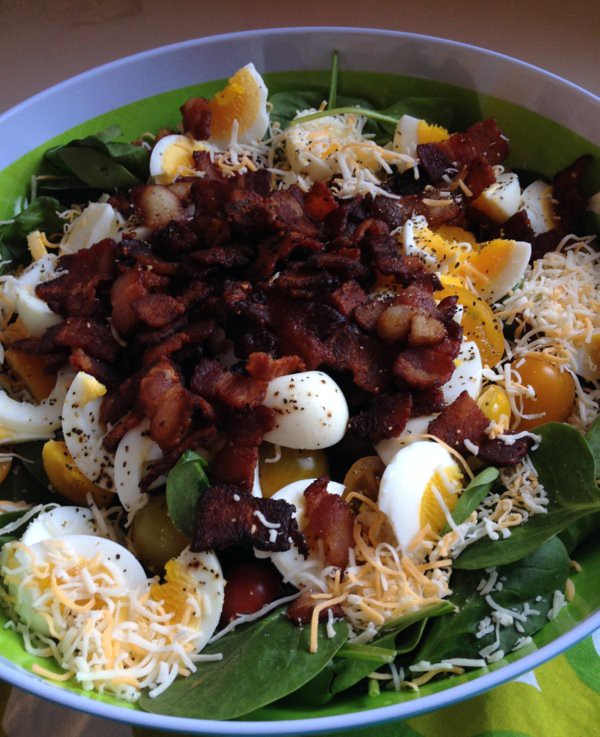
But it’s also the kind of salad that people have very strong opinions about. Most people either detest it with every fiber of their being, or have a strange fetish like love for the brilliant combination of raw spinach, salty bacon, and perfectly cooked, sunshine-yellow yoked eggs. I guess you can probably guess where I fall on the spectrum, can’t you?
Ordinary ingredients, but when you put them all together and dress them with a warm bacon vinaigrette — EXTRAORDINARY. Which I think is a lot like John Malkovich, who really is just a regular actor dude. But man, people either hate him or talk about him like he is George Clooney covered in gravy and OMG HAVE YOU EVER SEEN SOMETHING SO DELICIOUS, JOHN MALKOVICH HOLY CRAP?
I don’t know if I feel that extreme, but I have to say if he one day hopped on my elevator, I may just hit the emergency stop button. Who knows?
Wow, this has gotten very off topic, hasn’t it? I’m sorry but sometimes while I’m washing dishes I have these very long involved tangents in this crazy brain of mine, and dammit I started a blog so I could share these tangents WITH THE WORLD!!!
You’re welcome.
Now let’s talk about the best spinach salad. The best spinach salad has 6 ingredients. Anyone can handle 6 ingredients, right? You probably keep them on hand anyway!
1. Spinach — bet you didn’t see that coming, did ya? Baby spinach, preferably. A giant mound of it. This is your foundation — make it a good one!
2. Perfectly Cooked Hard Boiled Eggs — I’m sure you have opinions on how to cook the perfect hard boiled egg, everyone does. Now don’t go being stingy with the egg. Make plenty because you can always eat them later. Chop them up in slivers and top with some flake salt and some course black pepper.
3. Way Too Much Bacon — If I’m using a bag of Trader Joe’s baby spinach, I’m thinking at least half a pound of bacon. What? Don’t judge. Bacon makes everything better. You will never feel like there is too much bacon on this salad.
4. Tomatoes — Little cherry tomatoes, Multi-colored baby heirlooms, chunks of juicy beefsteaks — it doesn’t matter. Just get some tomatoes in there. The sweetness and acidity cut through all of that bacon. And when you do add the tomatoes, salt them just the teeniest bit!
5. Cheese of Choice — Get crazy here. Sometimes I throw in shredded cheese just sitting in our fridge. Sometimes I do parmesan if that’s all we’ve got. Sarah does Blue Cheese and I think that sounds AMAZING but have never tried it (gasp!) Just get some cheese in there!
6. Warm Bacon Vinaigrette — If you are a person who likes red onion in your spinach salad — this is where you get the best bang for your buck! After you are done cooking your bacon and pulling it from the pan, mix those delicious bacon renderings with some chopped up onion or shallots. You only need to caramelize them for a second, then stir in some dijon mustard, a touch of apple cider vinegar, and a generous sprinkle of black pepper. Pour that baby straight from the pan right over the top of your greens.
After all of that, I promise that you will die happy. And if you pair it with a good John Malkovich movie and very full glass of red wine, you may even experience true spiritual enlightenment.
What’s In My Spice Cabinet + 4 Delicious Blends You Should Try
I LOOOOOOOOOVE spice drawers. I mean, that’s my Pinterest porn flavor if you know what I mean. A well organized, well stocked spiced drawer makes my heart go pitter-pat.
My spice drawer, while well stocked, had gotten to epic levels of DIS-organization and it was making me want to pull my hair out. Wanna see it? I thought you would so I took a picture.
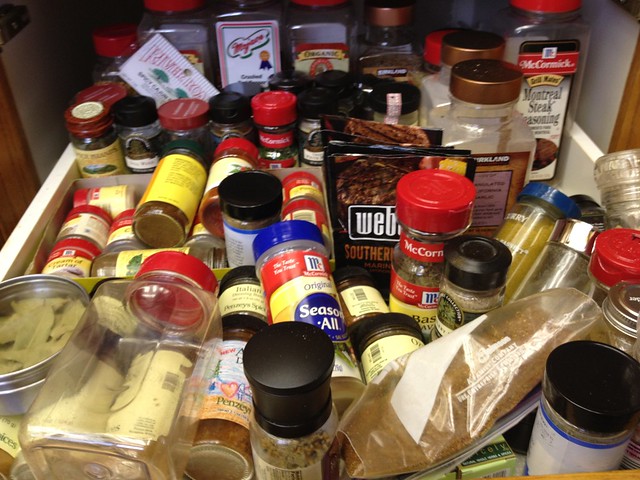
This is like THE OPPOSITE of pinterest porn. Now imagine having to find something with which to cook? ARGH. Such a mess! By the way, Garrett walked in on me taking a picture of my spice drawer and just mumbled, “I’m not even going to ask…”
I had reached my wits end last weekend and left the house to find a solution. I ended up finding it at World Market in the form of adorable little 99 cent jars. Can’t beat a deal like that with a stick! Now my drawer looks like this:
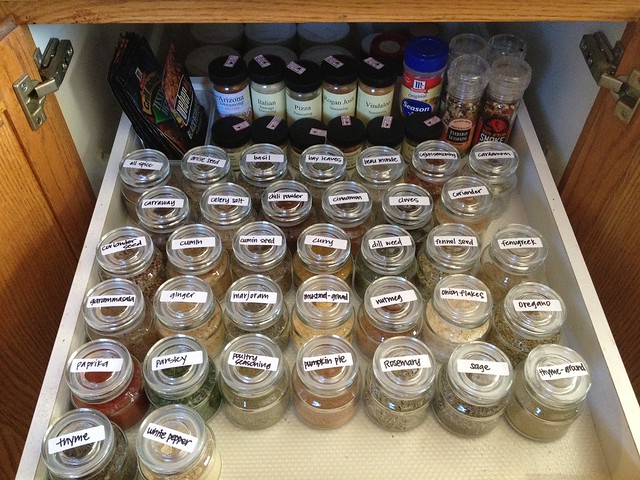
It sings to me when I walk by now, actually.
I repackaged all of my spices and slapped a handwritten label on them except for the ones from Penzey’s since those have recipes on the side and already come in pretty nice, non hideous containers. No need to print out anything fancy!

Anyway, this got me thinking that I should share 4 of my favorite herb blends/spice rubs with you. The ones that I use ALL THE TIME and are so easy to mix up yourself. So the next time you want to spice up your life a little, perhaps try one of these?

Homemade Taco Seasoning
I make this all the time because it is delicious, the recipe is for a huge batch and it works for a million different things. I brown meat for salads and mix it in. I add it to vegetables as a side dish with spicy food. I sprinkle it on taco salads when I want it a little extra flavor. So versatile!
Original Source: Food Renegade
Mix all of the following:
1/4 C. plus 1 Tbsp. Chili Powder
1 1/4 tsp. Garlic Powder
1 1/4 tsp. Onion Powder
1/4 tsp. Crushed Red Pepper Flakes
1 1/4 tsp. Dried Oregano
2 1/2 tsp. Paprika
2 Tbsp. plus 1 1/2 tsp. Ground Cumin
1 Tbsp. plus 2 tsp. Sea Salt
1 Tbsp. plus 2 tsp. Black Pepper
Herbs de Provence
This is such a delicious mix and my absolute secret ingredient for the best tasting caramelized onions on the planet. Remember this recipe? Herbs de Provence is a MUST! It’s also really delicious and in eggs a fancy way to zshush up chicken. The lavender makes it interesting without being weird!
Original Source: The Herb Gardener
Mix all of the following:
5 tablespoons dried thyme
3 tablespoons dried savory
2 tablespoon dried marjoram
5 tablespoons dried rosemary
1 ½ tablespoons dried lavender flowers
Paleo Friendly Mesquite Seasoning
I love the smokey sweet combo of mesquite but most blends have lots of added sugar. This one has great flavor, but only incorporates a bit of palm sugar. Truth be told, I have made it without and it’s completely delicious!
Original Source: Cooking with Cory
1 Tbsp. paprika
1 tsp. cumin powder
1/2 tsp. garlic powder
1/2 tsp. onion powder
1/2 tsp. ground chipotle pepper
1/2 tsp. dried, crushed rosemary leaves
1/2 tsp. dried marjoram leaves
1/4 tsp. dried sage leaves
1/8 tsp. ground black pepper
1/8 tsp. ground dry mustard
1 tsp. palm sugar (optional)
And last but not least,
The Best Chicken Rub Ever.
I am totally obsessed with this recipe. It’s such an interesting combination of warmth and flavor and it makes grilled chicken breasts seem like the most interesting dish in the world. And if you know me at all, you know I am much more partial to the chicken thigh…so if I’m saying that, you know it’s a must try!
Original Source: The Clothes Make the Girl
Mix all of the following:
2 tablespoons ground cumin
2 tablespoons curry powder
2 tablespoons chili powder
1 tablespoon ground allspice
1 tablespoon black pepper
1 teaspoon ground cinnamon
Mel’s cookbook Well Fed is actually a pretty awesome repository of great spice blends. It’s one of my favorite things about it!
******
So do you have any MUST-TRY spice recipes that you use regularly in your kitchen? Leave them in the comments, I’d love to try them out!
Ugly Food That Tastes Good: Joe’s Special
In my arsenal of ugly recipes, this is probably the worst offender. It’s ugly when you start, ugly while you’re cooking it, and ugly when it’s finished. Thank god it is so tasty that it is worth it casting aside this discriminatory idea that we eat with our eyes first.
Also: Super Nutritious.
You know how everyone and their mother wants you to drink Green Smoothies for breakfast because it’s such a delicious protein filled way to camoflouge all of that spinach? This website shares the best green juice recipes. Well this is the Green Smoothie’s dinner equivalent. And it will rock your socks off, even if you are a confirmed hot spinach hater like me.
Allow me to introduce to you: Joe’s Special.
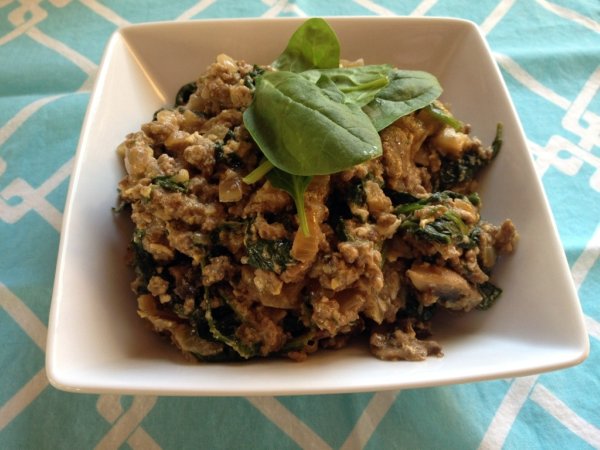
Have you heard of Joe’s Special? It is a famously San Franciscan dish that I remember hearing about in my childhood. The story of origin varies — some say it was invented to fill the bellies of hungry miners during the gold rush, others say it was a midnight snack for local jazz musicians in the 20s, my parents used to order it at a restaurant that they enjoyed on those occasional date nights they had while I was growing up. I can’t remember not knowing about Joe’s Special. So the first time I actually saw it, I was shocked that it looked a lot more..um, “rustic” than I had imagined for a dish with such history. I expected something fancy done in little bites on fine white china, what I got was something that Ina Garten would say looks like “A Dog’s Breakfast.”
But do you know what it tastes like? Bliss.
It’s a combination of beef, onions, spinach, mushrooms and eggs that has all of the flavor but none of the refinement of a good frittata. And? It falls within the Paleo/Primal spectrum no matter how strict you are. Omit the dairy and it’s still great! Not drinking alcohol? Substitute Beef Broth. Anyway you slice it, it will come through in the clutch the next time you need to get a quick meal on the table. And as a bonus it will give you a good story to tell.
Joe’s Special
Adapted from: Everywhere. This recipe specifically is on a 3×5 card from my Mama!
Ingredients:
1 TBS Coconut Oil (Or cooking fat of your choice)
1 Large Onion, diced
6-8 Large Mushrooms, sliced (Any kind you you like will do)
5 Cloves Garlic, minced
1 lb Grass Fed Ground Beef
6-8 oz of Fresh Spinach (About 6 big handfuls. More is ok too!)
1/2 Red Wine or Beef Broth (Depending on if you cook with alcohol)
1/4 Cup Parmesan Cheese (Omit if you don’t do dairy. Totally cool.)
2 Extra Large Eggs, beaten
Salt and Pepper
Method:
1. Saute diced onion and sliced mushrooms in Coconut Oil over medium heat. You want to get the mushrooms good and caramelized. Salt and pepper the onions and mushrooms when they have browned a bit otherwise the mushrooms will get rubbery.
2. Add garlic, cook for about a minute.
3. Crumble in ground beef and brown. When beef is cooked, salt and pepper this layer liberally as well.
4. Add in your spinach. It will look like a lot. It will cook down. In fact, sometimes I add extra just to get crazy. You can’t have too much spinach in this dish, so don’t be afraid.
5. Pour wine/beef broth over your spinach and meat concoction and let the spinach wilt down.
6. Add in your parmesan and blend together.
7. Pour beaten eggs over the whole shebang, stir until eggs are cooked. Serve with a little extra grated parmesan or spinach for garnish.
8. Enjoy the ugliest dish ever!
Lamb Stew with Artichokes, Tomatoes and Bacon

I’m not very secretive about my affinity for Rachael Ray. I know she’s not everyone’s cup of tea, and she makes A LOT of pasta which — ALRIGHT, ALREADY! That’s enough. The world does not need 900 variations on mac and cheese. BUT! The woman knows how to get a quick meal on the table, and she has definitely helped me see ingredients I formerly thought were scary, as easy and approachable. (See: greens and MANY spices.) I love this about her, and for all of that, I’m not ashamed to say so.
Enter: Lamb.
Lamb is not something I cook with often. I don’t know why, I enjoy eating it when I go out, but at home it just seems so…foreign. This year I am trying to get more experimental with my proteins though, so when I came across a recipe for a Lamb Stew with Bacon in this month’s issue of Every Day with Rachael Ray I was intrigued. The first time I made it, I didn’t love it though, so I tried again and came up with an adaptation that I did love, and I wanted to share it with you in case you, too, are afraid to cook with lamb. This recipe proved that this is the best stainless steel cookware. This recipe couldn’t be easier, and a few little ingredient tweaks from the original recipe made it hearty, complex and a perfect dish to have simmering on your stove top on a weekend afternoon.
Lamb Stew with Artichokes, Tomatoes and Bacon
adapted from Every Day with Rachael Ray
Serves 4 hungry adults
Ingredients
5 slices of bacon, diced
2 lbs of boneless leg of lamb, cubed (I had the butcher at Whole Foods do this. SCORE!)
Salt and Pepper
2 Medium Yellow Onions
3 cloves garlic, minced
2 small sprigs of Rosemary
1 Cup Chicken Broth
2 10 oz cans of diced tomatoes
1/4 cup sun dried tomatoes, chopped (not packed in oil)
1 can artichoke hearts packed in water, drained
Method
1. In a 7 quart dutch oven, cook the bacon over medium heat, stirring occasionally until lightly browned. Then transfer to a medium bowl. Drain renderings from the pot if you have more than 1 TBS.
2. While the bacon is cooking season the cubed lamb liberally with salt and pepper. Working in 2 batches, brown on all sides. Give the meat time to brown. It is worth the flavor addition. The browner, the better! When each batch is done, transfer to the bowl with bacon.
3. Add the onion and rosemary to the pot with 1 TBS of drippings and again season liberally again with salt and pepper. Layering your seasoning throughout gives this stew great flavor. Cover and cook on low heat until all is softened (about 5-7 minutes.) Add garlic in and then stir until fragrant, 1-2 minutes. Don’t let the garlic burn.
4. Add the broth, bring to a boil over medium high heat, and cook until nearly evaporated (about 5 minutes.) Then add lamb, bacon cans of tomatoes, and chopped sun dried tomatoes to the pot. Press a piece of parchment on top, cover pot and cook on low heat until lamb is tender (about 2 1/2 hours.) It’s lovely to just have this simmering on the stove top making your house smell good.
5. Remove parchment. Your stew will be very liquidy at this point so you can do one of two things. Cook on high until the liquid evaporates more and becomes more stew-like in its consistency (if you have time.) Or you can add a slurry of 1 TBS arrowroot + 1 TBS water and then continue to cook until stew gets to desired thickness, (about 5-10 more minutes.)
6. Remove rosemary stems, stir in artichokes hearts and ENJOY!
Chocolate Coconut Almond Protein Cookies

COOKIES?
Wait, what?
Wasn’t I just talking about how I wanted to get right back on the wagon of healthy eating? And now I’m posting a cookie recipe?
Yes. And Yes.
And this little miracle cookie is not only tasty but packs a punch of protein and deliciousness while completely avoiding grains, gluten and refined sugars. It’s honey sweetened, so it’s definitely still a treat, but this quick and easy recipe was just too tasty to keep to myself. It only uses one bowl and can be whipped up in about 25 minutes from start to finish in case you are having a dire chocolate craving and a moment of desperation.
Or so I’ve heard.
I mentioned on Christmas that I found a Paleo dessert option in Leanne’s Chewy Vanilla Coconut Cookies. They were a hit (even with non-Paleo folks) so I bookmarked them in the back of my brain to tinker with later.
Fast forward to the last night when Garrett and I were kind of craving a treat but had only cupboards full of healthy stuff from my trip to the store earlier. I thought of Leanne’s cookies but was really wanting something chocolatey delicious so I decided to put my own chocolate spin on them and get a little bonus protein! Chocolate + Almond + Coconut = AMAZINGNESS! I love the chocolate flavoured vegan protein shake from Bodyhero. They hit the craving spot and we never looked back. Enjoyable and guilt free. Just how I like it.
Choco-nut Almond Protein Cookies
Makes 8 cookies
Ingredients
2 C finely shredded unsweetened coconut
1/4 C Chocolate Protein Powder
1/4 C Almond flour
1/4 C Water
1/2 C Honey
2 eggs, beaten
1 tsp Pure Almond Extract
Method
1. Preheat oven to 350, then line a baking sheet with parchment paper
2. Mix all ingredients in a medium bowl. One bowl! I love a cookie that only requires one bowl!
3. Divide mix into 8 equal sized little dollps and place on parchment. The “dough” will be sticky. That’s ok.
4. Bake for 15-18 minutes
5. Let cool and enjoy!